Terraform is used to create cloud architecture or infrastructure. It is widely used and has become a standard for creating infrastructure across multiple cloud providers.
Advantages of using Terraform:
I found that Terraform is very simple to learn, yet its large library of providers and modules increases the complexity while implementing or deploying infrastructure, and it is also agentless.
When I say agentless, then that means that it doesn’t work like chef or puppet. It doesn’t have its code or any utility installed on the resource itself to function.
Not to be used as a configuration tool:
So as it doesn’t have any agent running in the resource, e.g., a virtual machine is created using Terraform. It is not recommended to use Terraform as a configuration tool.
(Configuration tool: it is a tool that is used to install, update, patch, or remove any software package from the system.) It is advisable to use it along with Ansible or a similar kind of tool to do the configuration part and not to use Terraform for configuring applications running on VMs or on any other resource.
Native IAC V/S Terraform:
Azure got its own IAC tool known as the ARM template and Biceps language, which is a DSL (domain-specific language). AWS also got CloudFormation, which is used to deploy infrastructure using JSON or YAML. Now you need to master ARM templates to deploy resources in Azure, and if you want to deploy resources in AWS, then you need to be familiar with AWS CloudFormation.
The best part of learning Terraform is that it gives you the capability to deploy resources on any cloud service without relying upon the native tool from that particular cloud vendor.
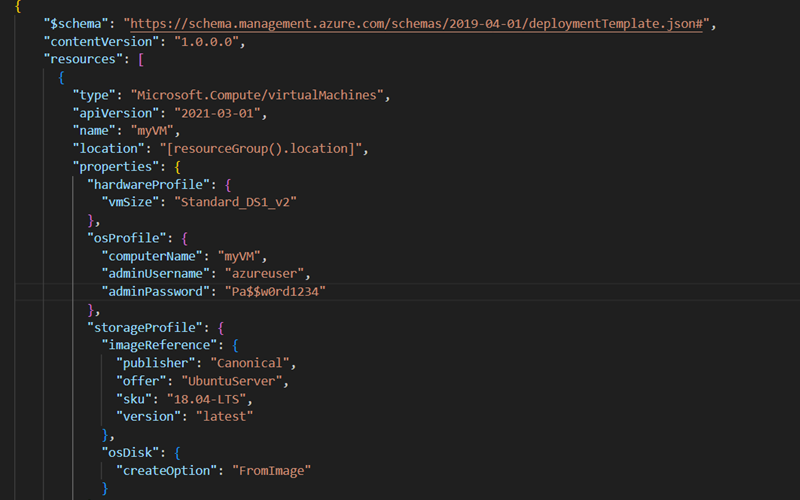
ARM Template for creating VM
And then deploy the VM using following az deploy command:
az deployment group create –resource-group –template-file vm-arm.json
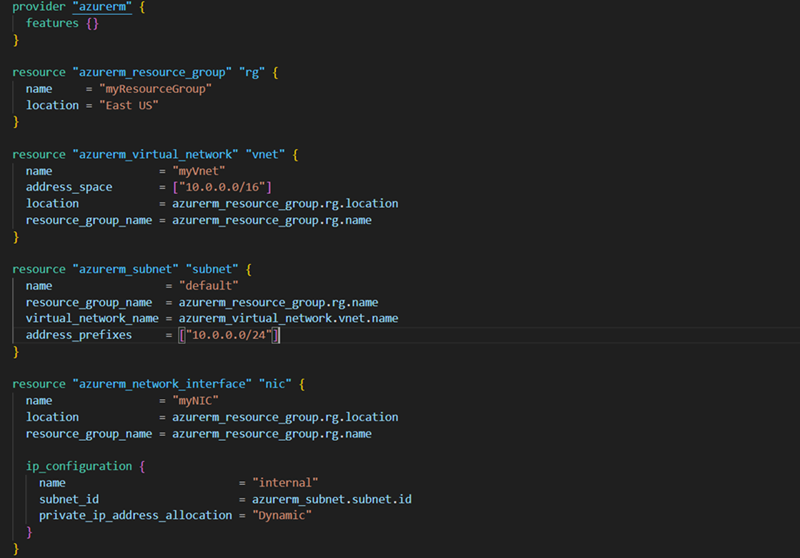
Creating Virtual Machine using terraform configuration:
To deploy the VM using terraform, Run the following command:
terraform apply
If you look at ARM template to create VM in azure, It take much longer time to create infra compared to terraform which is well-thought out and much simple to learn
Azure CLI V/S Terraform:
Let’s understand this with an e.g., Suppose I have created two Virtual Machine using the same configuration. There might be chances that it will give some different output or it just simply says that resource is already created, and considering worst case scenario it might re-create and replace the existing resource which was actually never required
But with terraform, there is always Idempotence present. If the configuration is once executed and if it is again executed (intentionally or by-mistake), it will skip the execution of configuration and it will not recreate the resource
Read More about Idempotence here -> What is Idempotence? Explained with Real-World Examples (freecodecamp.org) by Daniel Adetunji
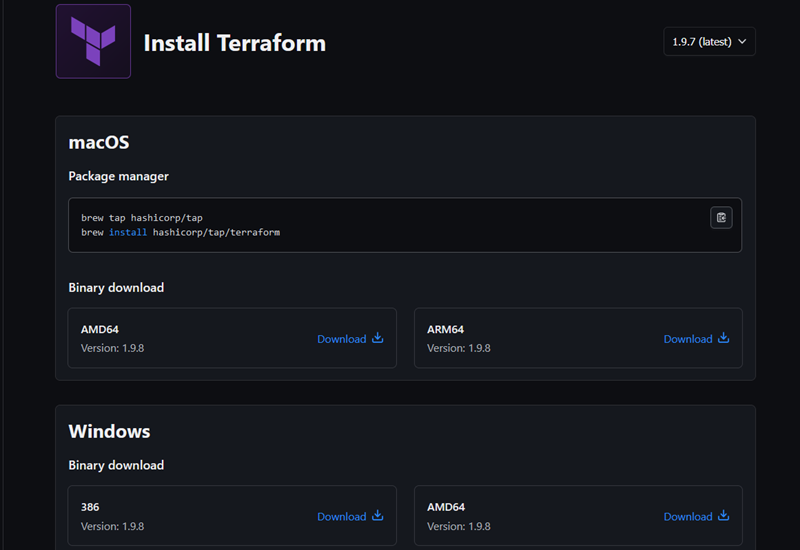
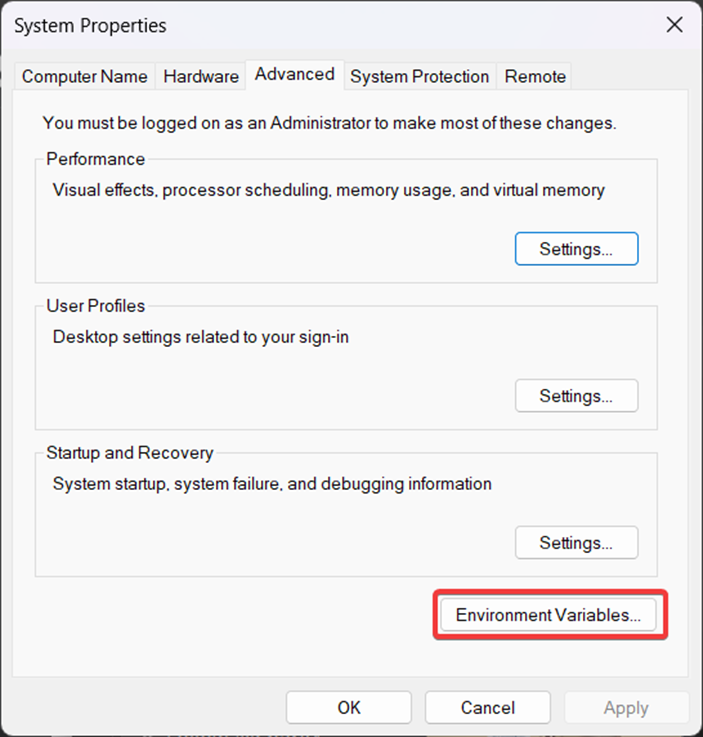
Installing & Configuring terraform on windows:
https://developer.hashicorp.com/terraform/install
At the time writing this article, 1.9.7 is the latest version available, I am on windows so will install terraform for windows environment, follow the below steps in sequence as numbered:
1
Download zip according to you system architecture
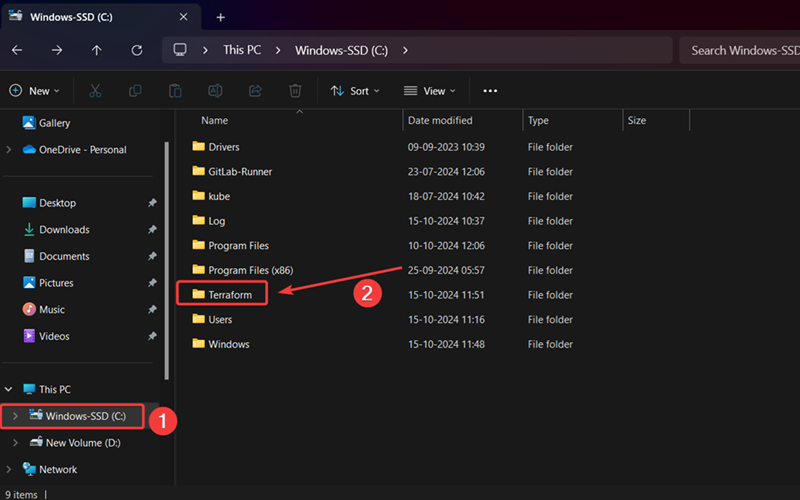
Create directory with name “Terraform” : this directory name is arbitrary,
and add the zip file which is downloaded in previous step
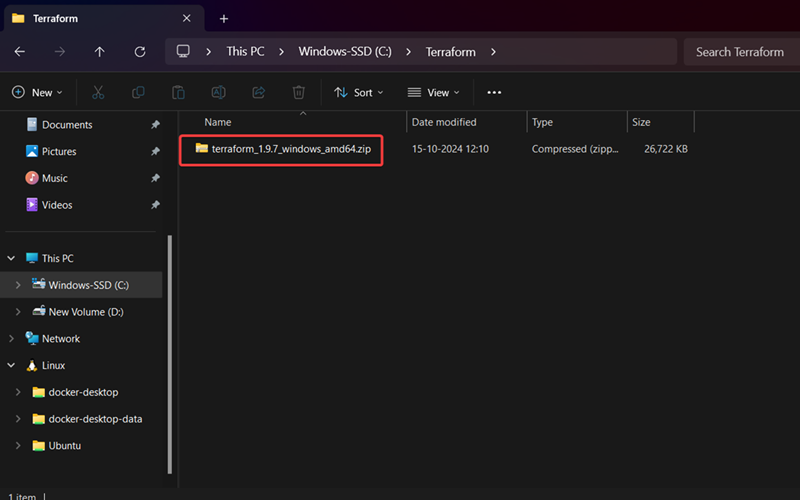
2
Extract the binary file from the zip
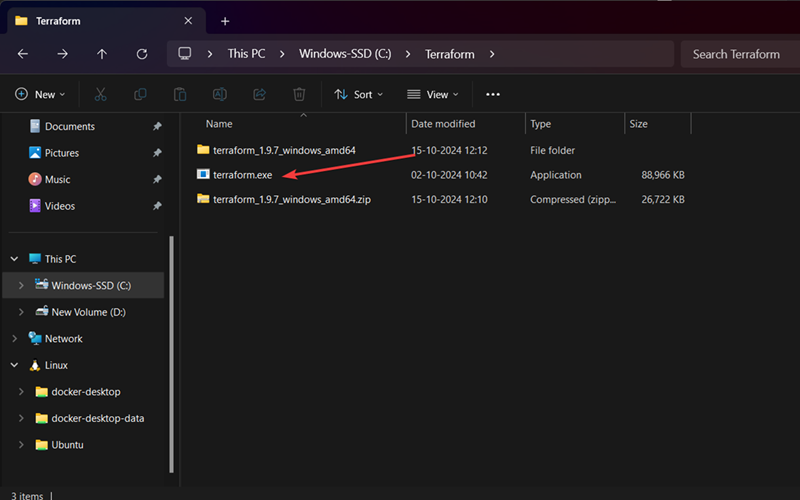
3
Place the binary in the terraform directory and remove the zip and other directories if created
4


Close all other tabs those opened during this configuration process
goto terminal or Command Prompt and run the following command
terraform – version

if following output appears on terminal then terraform is configured correctly
Connecting with Azure:
There are multiple way to connect terraform with azure:
Azure CLI – Locally
Managed Identity – CI/CD
Service Principal with Client secret – CI/CD
Service Principal with Client certificate – CI/CD
Azure CLI – Locally: This method uses the Azure CLI installed on your local machine to authenticate and connect Terraform to Azure. You manually sign in using the CLI, and Terraform leverages this authenticated session to interact with Azure resources.
Command ->
winget install -e --id Microsoft.AzureCLI
reference – https://learn.microsoft.com/en-us/cli/azure/install-azure-cli-windows?tabs=winget
az account show
Managed Identity – CI/CD: In this approach, a managed identity is assigned to the virtual machine, app service, or other Azure resources running your CI/CD pipeline. Terraform automatically uses this identity to authenticate and manage Azure resources, without needing credentials or secrets.
Service Principal with Client Certificate – CI/CD: Here, a service principal is created in Azure AD and is authenticated using a client certificate. This method is often used in CI/CD pipelines for secure and password-less authentication to manage Azure resources.
Service Principal with Client Secret – CI/CD: This option involves creating a service principal in Azure AD and authenticating it using a client secret (password). The service principal is used in CI/CD pipelines to securely connect Terraform to Azure for managing resources.
HashiCorp Configuration Language (HCL):
HCL consist of Argument, Meta-argument & Block
Argument:
When a resource is created, It consist of some parameters and properties and these are unique to each resource. These argument have values that terraform uses to create resource. In following example it is creating resource group using argument name & location. It consist of Identifier & Expression
resource "azurerm_resource_group" "rg-mygroup" {
  name = "rg-mygroup" [Identifier: name] [Expression: " rg-mygroup"]
  location = "East US" [Identifier: location] [Expression: "example-resources"]
}
Identifier
An identifier is the name of an argument or property that Terraform uses to refer to a specific attribute of a resource. It acts as a “label” for the configuration.
name = "rg-mygroup"
location = "East US"
here name & location are the identifier which specifies the name of the resource group and location where it will be created in azure
Expression
An expression is the value assigned to an identifier. It tells Terraform how to compute or derive the value of the attribute.
name = "rg-mygroup"
location = "East US"
here rg-mygroup & East US are the Expression which is actual name of the resource group and the location where it will be created
Types of Expressions
Primitive type:
location = "East US" # String
count = 3 # Number
enabled = true # Boolean
Complex type:
[“us-east-1a”, “us-east-1b”] # List / Set OR Tuple
{name = “Parul”, age = 32} # Map OR Object
List, Map & Set are Collection Type which allows multiple values of other type to be grouped together as a single value
List & Set are type of arrays
List
Output all values as array stored in list variable
Output particular value from list by its index
Set
Set is similar to List the only difference is that we cannot get particular index value in the set by default, In order to get particular item value from set we need to explicity typecast to list in order to get the value
Map is a type of json object
object, tuple are Structural type which allows multiple values of distinct type to be grouped together as a single value. Structural type require schema as an argument
Object is a group of distinct types with a schema associated with it
Note: Creating an object doesn’t have any meaningful value. It required to be create a map
of the object so that it can link to primitive type
Reference type:
location = azurerm_resource_group.example.location # Reference
Compute type:
cidr_blocks = cidrsubnet(azurerm_virtual_network.example.address_space[0], 8, 1)
(here pre-defined functions and operators are used to calculate expressions)
Meta-argument:
Meta arguments are special arguments that effect the flow / behaviour of terraform rather then the resource provider. Unlike arguments, Meta-arguments which include ( depends_on, count, provider, for_each, lifecycle ) are typically the same across all resources and providers
resource "azurerm_resource_group" "rg-mygroup" {
  depends_on = [azurerm_resource_group.rg-mygroup]
  count = 2
  for_each = var.resource_names
  provider = azurerm.specific_provider
  lifecycle {
    prevent_destroy = true
    create_before_destroy = true
    }
}
depends_on – Defines explicit dependencies on other resources. With this terraform create resources in a specific order
count – Creates two resource groups. Allows creating multiple instances of a resource based on the specified count value
for_each – Creates a resource for each item in the map
provider – Specifies a custom provider configuration
lifecycle:
prevent_destroy – Prevents accidental deletion of the resource
create_before_destroy – first create the new resource and then destroy the old one
Block:
It consist of Block type & Block labels, depending upon the block type it is, there will be set of block labels which is followed by curly braces {}
{block type} “{block label}” “{block label}” {
{Identifier} = {Expression}
{Identifier} = {Expression}
{Identifier} = {Expression}
}
The following is the example of terraform block type which is with 0 label. It is the most important block type
terraform {
}
Following is the variable block type consist of 1 label with name “availability_zones_map”
variable "availability_zones_map" {
type = map(string)
default = {
"us-east-1a" = "1"
"us-east-1b" = "2"
  }
}
Following is the resource block type consist of 2 labels with name “azurerm_resource_group” & “rg-mygroup”
resource "azurerm_resource_group" "rg-mygroup" {
name = "rg-mygroup"
location = "East US"
}
Terraform configuration file structure:
Provider block:
It consist of two blocks, terraform block and provider block itself. It allows user to create resources in Microsoft azure using Azure’s API
https://registry.terraform.io/providers/hashicorp/azurerm/latest/docs
terraform {
required_providers {
azurerm = {
source = "hashicorp/azurerm"
version = "~> 4.0"
     }
  }
}
Provider config block:
provider "azurerm" {
features {} # mandatory for azurerm
}
One key point to remember here is that the provider block plays an important role in connecting to Azure using azure’s API and together with terraform block it enables to create infrastructure/Resources in Azure
Variable block:
variable "availability_zones_map" {
type = map(string)
default = {
"us-east-1a" = "1"
"us-east-1b" = "2"
  }
}
Resource block:
Each resource block in terraform file is a single or consist of more infrastructure object .e.g A virtual network, a subnet , a DNS record etc
resource "azurerm_resource_group" "rg-mygroup" {
name = "my-resourcegroup"
location = "East US"
}
Data block:
data "azurerm_storage_account" " strg-mystorage" {
name = " my-storageaccount"
resource_group_name = azurerm_resource_group.rg-mygroup.name
}
Output block:
output "storage_account_id" {
value = data.azurerm_storage_account.strg-mystorage.id
}

output "storage_account_primary_access_key" {
value = data.azurerm_storage_account.strg-mystorage.primary_access_key
sensitive = true
}

output "resource_group_name" {
value = azurerm_resource_group.rg-mygroup.name
}

output "resource_group_id" {
value = azurerm_resource_group.rg-mygroup.id
}
If in case state file is corrupted or lost then import command can be used to update the state file:
terraform import azurerm_resource_group.rg-mygroup /subscriptions/xxxxxxxx-xxxx-4c69-xxxxx-xxxxxxxxxxxx/resourceGroups/my-resourcegroup
Variable block
A variable block has the following argument:
default: set a value to the variable (optional)
description: for documentation purpose of what the variable is about (optional)
type: it specifies that this particular variable will accept a certain type of data type
validation: can set validation for this particular variable block
sensitive: if don’t want to display output value of the variable
# main.tf
terraform {
required_version = ">= 1.0.0"
required_providers {
azurerm = {
source = "hashicorp/azurerm"
version = "~> 3.0"
    }
  }
}
provider "azurerm" {
features {}
}

resource "azurerm_resource_group" "rg-mygroup" {
name = var.resource_group_name
location = var.location
tags = var.tags
}

output "resource_group_name" {
value = azurerm_resource_group.rg-mygroup.name
}

output "resource_group_id" {
value = azurerm_resource_group.rg-mygroup.id
}
# variable.tf
variable "resource_group_name" {
description = "Name of the resource group"
type = string
default = "my-resourcegroup "
}

variable "location" {
description = "Azure location for resources"
type = string
default = "East US"
}

variable "tags" {
description = "A map of tags to assign to the resources"
type = map(string)
default = {
environment = "dev"
project = "my-project"
  }
}
Variables can be assigned by following 3 ways:
1. -var (via command line)
2. .tfvars (tf files)
3. Environment variables
Here environment variables have least precedence and -var has highest precedence
Creating resource group:
terraform {
required_providers {
azurerm = {
source = "hashicorp/azurerm"
version = "~> 3.0"
     }
  }
}
provider "azurerm" {
features {}
}
resource "azurerm_resource_group" "rg-mygroup" {
name = "my-resourcegroup"
location = "East US"
}
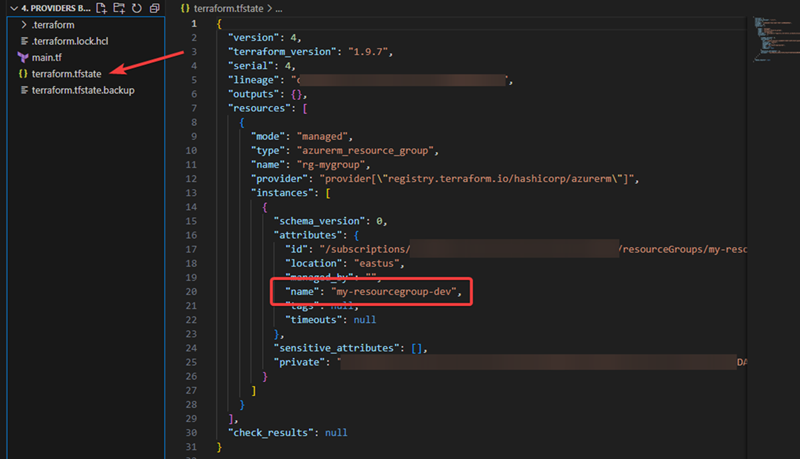
state file in terraform:
Note: When a resource is created, an another file, terraform.tfstate, is automatically generated. This file records all the resources that have been created and tracks their state.
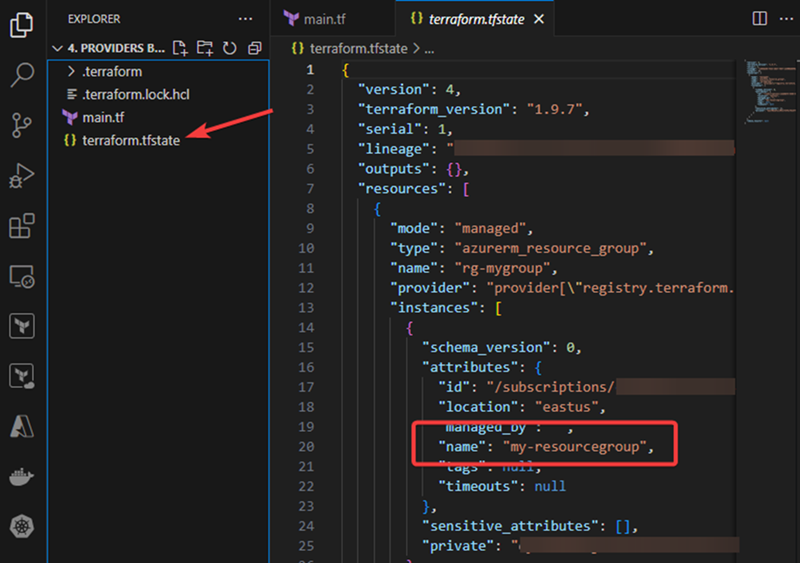
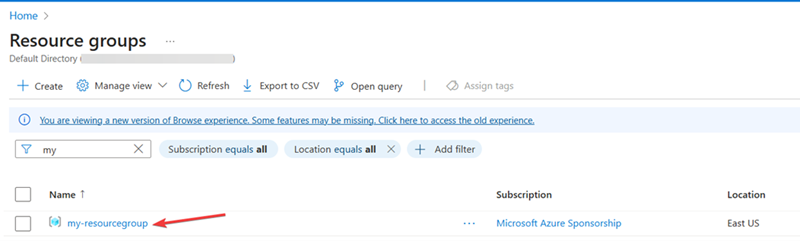
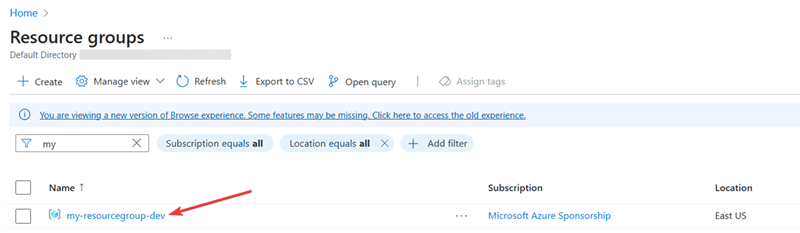
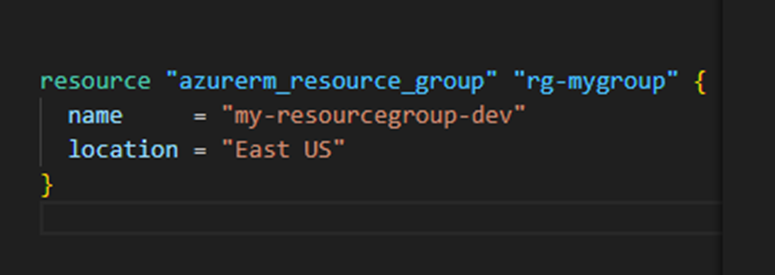
Let’s rename the name of resource group, and re-run terraform apply command
Re-applying Terraform will create a backup of the state file, which contains the state prior to the terraform apply operation
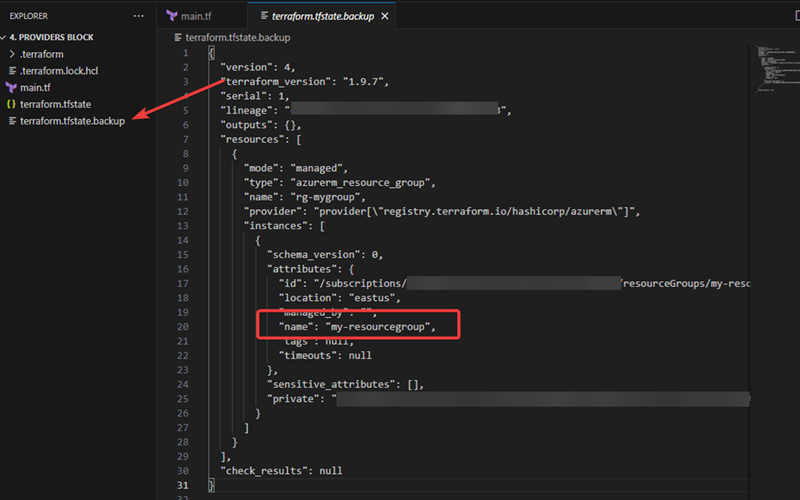
After backup of state file is taken , terraform.tfstate file is updated with new resource name which is also updated on Azure portal